Pages

Saturday, July 30, 2016

Saree Design -With Kalamkari border again

I never get contended with collecting and designing with  traditional paintings of India. Kalmakari is one such art. I have kalmkari patches, kalamkari borders, kalamkari duppata, kalamkari saree , kalamkari hand block printed clothes etc. Still whenever I see clothes with kalamkari art, I end up buying that. :-). I have designed 3-4 sarees using kalamkari patches. First one was with Paisley designs , and recently designed some sarees with Kalamkari border for my customers.

Another saree with blue silk material and Kalamkari border was designed with a zari border. If I use zari border and cloth with zari motifs, I can't wear it on casual day. So this time designed Kalamkari saree without zari, so that I can wear it anytime , any day :-).
Here it is :
Kalamkari saree
Kalamkari saree

I chose a beautiful Kalamkari border with peacock design, in light green color. Here is the Kalamkari border:
Kalamkari saree
Kalamkari border

I was searching for a right cloth for this border. I could have chosen dark green or pink. But decided to avoid dark colors this time. So selected pastel color . As the border has pink color too, I chose pink color as contrast. For the pink color , I used the cloth from my mother's old silk saree.
Here are the materials I used :
Kalamkari saree
The materials chosen

Attached the kalamkari patch as border along the saree, contrasting it on both the sides with small strip of pink silk cloth.
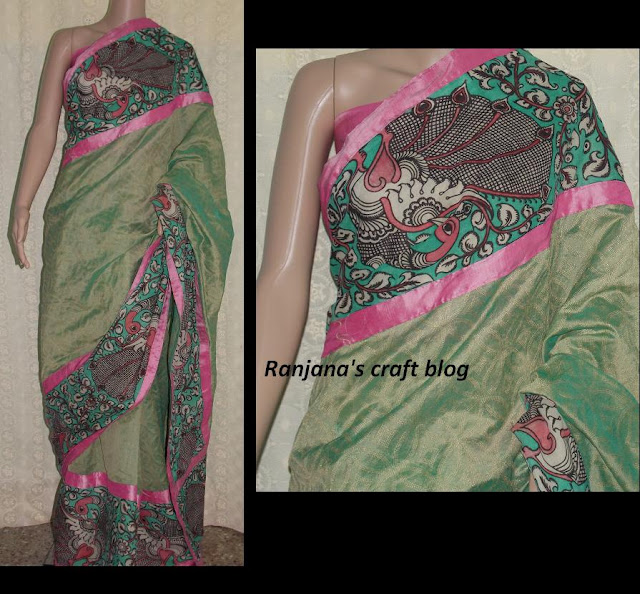
Kalamkari saree
Kalamkari saree

The pink silk saree cloth is remaining . So I will use it for the blouse. Though it has some glossy silk look, but I can wear it on casual day too. Or shall I choose a blouse in cotton for this?

Designing dress with  Kutchwork, learning some more forms of crafts. Eager to share my experiments and experiences with arts and crafts with you.

Love , laugh and live the life to the fullest,
-Ranjana
 

Wednesday, July 27, 2016

Madhubani painting on wooden box- Tutorial

In the process of organizing and decorating my craft room, I'm making many hand crafted items. Already I have shared  about the wooden boxes painted. One box with Warli design and and another with decoupage.

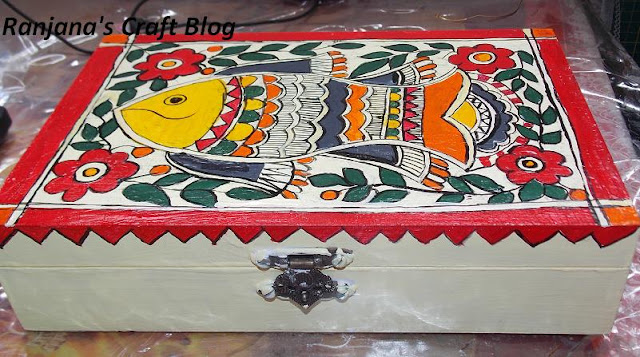
About Madhubani art I have written in one of my posts,Madhubani Art( Mithila Art) -Art from an ancient city .I have been wanting to learn Madhubani art. But never got an opportunity to learn it from a professional. Still my search is on for a professional Madhubani artist to learn this beautiful art. Thought of trying this art , by painting it on a wooden box. I searched many tutorials online, and tried to paint. This is my first attempt in Madhubani art.

Here it is :
Madhubani art

Tutorial to paint on wooden box:

First step is to paint the wooden box with wood primer. You can use acrylic white color too.After the application of  primer wait for 4-5 hours so that it dries completely. Then apply white acrylic color.I have mixed a drop of yellow color, to make it look like a handmade paper. :)
Madhubani art
Wooden box with after first layer of paint applied


How to transfer the design :

The tedious task is to transfer the design, may it be embroidery or painting. If you can draw , it is  good. If you can't then the design should be transferred. There are many techniques to transfer design.I used pencil scribbling method. Here are the steps of the method:

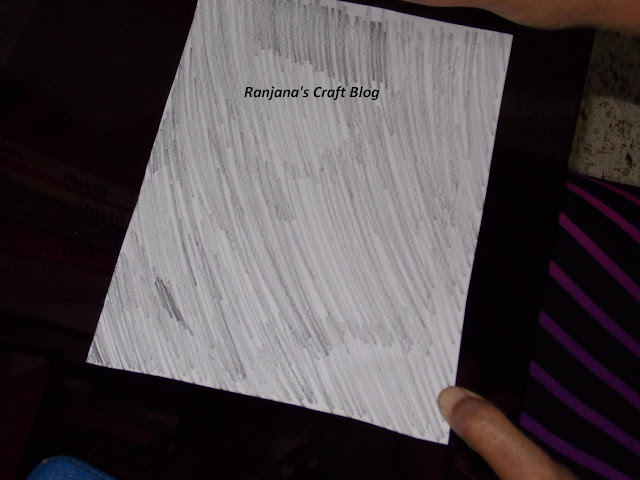
1. On the wrong side of the design page , scribble with 2B pencil. 
transfering design
Scribble on the wrong side of the design


2. Now keep it on the surface where the design has to be transferred and draw lines of the design with sharp pencil.
Madhubani art
Draw on the design
The design will be transferred on the surface:
Madhubani art
Design transferred on the surface
I prefer this method over using carbon papers to transfer designs , as carbon papers leave black patches sometimes.
After design transferred, paint it with the required color. In Madhubani art the major colors used are  red, yellow, green and black.
Here it is after painting:
Madhubani painting
Madhubani art on wooden box
There may be many mistakes in the first attempt.
Hope soon I will find a Guru , from whom I can learn this traditional art :)

Planning to design a saree with Madhubani designs. Will share the saree design soon with you.

Until then,


Love , laugh and live the life to the fullest,
-Ranjana
 

Wednesday, July 20, 2016

Colorful Handmade Card

Recently have shared about a Birthday card made to wish on first Birthday. Same day was my niece's birthday. So to wish her  I made another card. She loves colors, flower and butterflies. So decided to make a colorful card with flower and butterfly motifs.

To make the card, selected handmade papers in yellow and pink color. Here are what I selected:
handmade paper
Handmade paper
Pink handmade paper-Isn't it beautiful. I never had the idea of what to do with  this paper, when I saw it in the shop. But loved the color and the texture. So bought :). This is what happens with most of the craft lovers :)

handmade paper
Handmade paper
Cut the paper and attached it as a border.
handmade paper
Border attached
And decorated it with lovely embellishments. Here is the card:

handmade card
With colorful embellishments

 My niece was very happy to see the colorful card :)

Love , laugh and live the life to the fullest,
-Ranjana
Monday, July 18, 2016

Glass painting - a new art learnt

I knew about glass painting  and I had tried making 2-3 glass paintings earlier too. Any form of arts and crafts, I wish to learn from professionals, and in detail. Because of time constraints sometimes I'm not able to learn from professionals. But the workshops arranged by some  arts and crafts teachers have helped me a lot to learn some crafts in depth. I have already shared about how I learnt cutie doll making and siporex mural making , making in such workshops organised.
Recently learnt glass painting from a professional . This was a very nice learning experience. The art teacher was very efficient to teach more than 10 people in the stipulated time. As we had selected different glass painting designs to paint , she was giving equal attention to all. I'm very happy about what I learnt from her and also about the glass painting I made. Sharing my happiness with you :)
Here is the glass painting I made:

pebeo glass painting
Glass painting
 This glass painting is made using pebeo glass painting materials on frosted glass. 
Here are  some more glass painting designs made by other fellow learners:
pebeo glass painting
Peacock design -glass painting

pebeo glass painting
Floral design -glass painting

pebeo glass painting
Garden-glass painting
 Made many cards to wish on birthdays etc. Will share in the next post.


Until then-
Love , laugh and live the life to the fullest,
-Ranjana

Monday, July 11, 2016

Handmade Card - First year Birthday

Last Saturday I got an invitation call from one of my friends, to attend his son's birthday party. The party was that day evening itself. I always prefer to give handmade gifts and cards. To many kids and infants I have gifted  applique work quilts and crocheted frocks .
As the party was on same day, I could not make any gift, so thought of buying it. Made  a simple card to wish the kid on his birthday. I'm not so good in making amazing cards, like some of my craft friends make. While making card, I give importance to theme.
 As it was for baby , I  selected pink color paper.

handmade card
Pink paper to make the card

 And attached attached the border made by Martha Stwewart punches on the edges.
handmade card
With punched border
 To make the theme "one year birthday", cut the shape of  1 and attached some ready made embellishments I had. I made it colorful, thinking the child might like the bright colors :)
handmade card
With colorful embellishments
 My son was happy to give this to the birthday boy :)


Planning to make a crocheted frocks as gifts to bay girls. Will share once I make those.

Until then,  
Love , laugh and live the life to the fullest,
-Ranjana

Friday, July 8, 2016

Mini craft iron- A review

I had learnt sewing, from my mother. She used to stitch clothes for us. I  learnt sewing watching my mother sewing. After my studies I learnt it from a professional tailor. I used to stitch dresses, salwar suit for myself . Now due to lack of time I give it to professional tailors.

Still I design saree , do applique work and make quilts. The people who sew understand the importance of iron in sewing. In many stages of sewing , ironing is required. It is really tedious to get up frequently from the sewing seat and iron the cloth , and sew. I always felt a small iron box is required while sewing, especially quilt. Though I bought one from an online store, that was not comfortable. My search ended for a convenient craft iron  , when my sister in law got a mini craft iron from US.

Mini craft iron
Mini craft iron
This is very small, and convenient. It can be kept on the sewing table while sewing. It has a long electric cord. It can be used , if  electric plug is quite away from sewing table. It works for 110v and 220 v. So no transformer is required.
Mini craft iron
Mini craft iron- length 4 inches
Its length is 4 inches and the handle also very convenient. The small indicator bulb inside the iron.

Mini craft iron
Mini craft iron

And has a non stick coating, because of which the cloths and threads do not  get stuck to the iron.
Mini craft iron
Mini craft iron
I use it almost all sewing projects, like attaching borders to sarees, applique work, quilting etc.
Mini craft iron
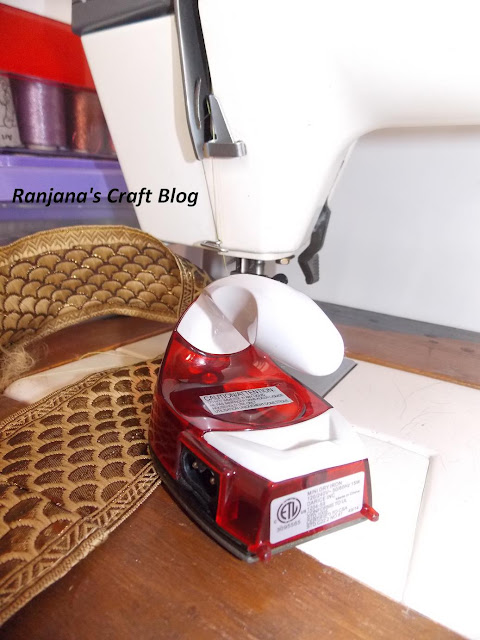
While stitching border
Only drawback I have encountered is, the cord comes out quite often. So whenever I use the iron, I unplug it after heating and use.

For making quilts, dolls' dresses, applique work etc I feel it is better to use these kind of iron, for better result and the finishing of the product will be good. It might not work for thick cloths( like thicker than jeans cloths.) I don't  know , about its usage in paper craft, as I haven't used it while working with paper craft.

Love , laugh and live the life to the fullest,
-Ranjana
Google analytics