Pages

Sunday, February 28, 2016

Saree blouse design- Kamalkari embroidery

For me always saree is the most beautiful outfit. Saree coupled with properly designed blouse will make saree look more attractive. Nowadays there are several saree blouse patterns available. Normally the saree blouse is designed with either with embroidery, painting on back neckline etc.
I designed this blouse for the Dakkai Jamdani saree , I have.
The saree has geometrical and floral design weaving on it, with black background. I thought of embroidering geometrical designs on the back neckline.

Here is the saree:
As it has floral designs also, then changed my decision to combine both geometrical and floral design. The best one is Kamalkari embroidery, which looks like geometrical flowers :)
 Then what else can stop, just traced the design along back neckline and embroidered with Kamalkari. This took very less time, as Kamalkari threads are thick and filling is easier.
Here is the completed design:
Closer view of the embroidery:
Kamalkari embroidery can also be used for dresses and Kurtis.Its very easy to embroider with Kamalkari. Will share tutorial and some more designs in coming posts.

Until then,

Love , laugh and live the life to the fullest,
-Ranjana

Wednesday, February 10, 2016

DIY craft- Tutorial to make Sandook(Box) from waste boxes

Sandook is a box , which is used earlier days for storing precious items like jewellery. These were used by king and queens of India for the storage of their jewels. Now also there is a big Sandook in my mother's place, in which many old books are stored. Inspired by the sandook, I made similar box, by a cardboard box.
DIY craft
Sandook made of cradboard

  Here are the steps how I made the sandook: 


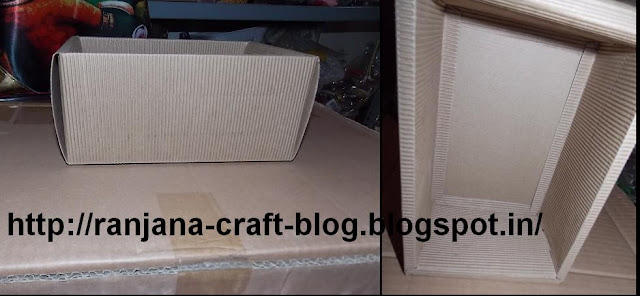
I had these two waste cardboard boxes . One was small and another quite flat one.Here are those boxes:
DIY craft
Two packaging boxes
To making of semi circle sides is quite difficult as it requires exact measurement. I measures the side of the box, and with half of its measurement drew two  semi circles on the card board:
DIY craft
Drawing the semi circles
 Then cut the semi circles along its boundaries:
DIY craft
The semicircles required for the sides
After cutting , the semi circles, bent the other card board piece of same size as the box. And attached the semi circles made out of cardboard on both the sides. The steps are illustrated in image number 4,5,6 and 7. Now the  portion of  of the sandook is made.
DIY craft
Steps to make the lid of the sandook
Next attached this top portion to the cardboard box, with fevicol and a cloth. The reson behind using the cloth was to make it easy to open the lid.
DIY craft
Attach the lid with a cloth on one side of the box
To this box attached  ice cream sticks all over the box, as illustrated int the below picture:
DIY craft
Attach ice cream sticks

It is now ready for painting and decoration! Painted with wood color and attached shiny tape along the corners.

Paint it and attach the border along the corners

Now the sandook is ready for storage:
DIY craft
Sandook is ready
It is now placed in my shelf  which was decoupaged , in my craft room.

I have stored all valuables like my spectacles, pen drive, and some electronics items in this sandook, so those will be easily accessible, as I keep forgetting the place where  kept those.

Will share about some more DIY crafts in coming posts.

Until then,
Love , laugh and live the life to the fullest,
-Ranjana

Tuesday, February 2, 2016

Saree designed with an old silk border

Last year I could  design very few  sarees. All the materials I have bought to design sarees are quitely sitting in the cupboard waiting for their turn,to get designed as saree. I could complete an order from my friend , designing Saree with screen printing . And another with paisley design.

And for myself I had designed a saree with patchwork of cloth with pritns of Jaimini Roy's paintings. Another as a gift to my sister in law, with Kalamkari Border. I have done saree designing with patch work or attaching of borders, as it is easy and takes very less time. Thinking of designing sarees with fabric painting , Kutch embroidery and Kerala Mural painting. Don't know when I can complete the designing of those sarees :)

Here is the one I designed recently:
This I designed for my mother in law. She had an old silk saree which was damaged all over the body. But the border is very beautiful and not damaged. Still the zari has the same luster.

To contrast the border I bought simple cloth in dark blue, with motifs all over in Banarasi weaving.

See how the border looks on the cloth:


Stitched the border along the length , using my sewing machine. This sewing machine is always my favorite. I have designed many sarees using this machine and made many embroideries too.


And little above the border attached  a small border made from the brocade cloth I had.
Here is my Chammak Challo ( the mannequin) wearing the saree.

I didn't have to design the blouse for this, already my mother in law had the same old blouse stitched. :)

Soon will design a saree with Kutch work embroidery. Hope I will complete that soon.

Until then,
Love , laugh and live the life to the fullest,
-Ranjana

Google analytics