Pages

Showing posts with label DIY. Show all posts

Friday, April 8, 2016

Customized photo frame- theme Table Tennis sport

Again was away from blogging for one month. Every year in the month of March I get busy with annual exams of my students. So every year I come with same excuse , "Uff! these exams!". This time it was very hectic.This time I could not check comments, forget about writing a post. I was away from all my craft projects and designing projects. During those hectic days also, I had to make a customized photo frame, as this was an order from my son :).
Being a table tennis player , he wanted to gift his friend , who is also a a table tennis player. So I made this photo frame with theme of  table tennis sports.
Here it is :

photo frame
Photo frame - Theme table tennis

The frame is in the color of table , 2 rackets , a ball and a trophy.

How to make themed photo frame:

Sharing the tutorial to make the photo frame :
Choose photo frame of required size, and paint the frame  with primer:

photo frame
Paint it with primer

Allow it to dry, and on that paint dark green color. I had selected this color, because I wanted to make it look like a table tennis table. You can select color according to theme you have selected.
photo frame
Paint with required color
Using m-seal clay, or any other clay make two table tennis rackets and ball:
photo frame
With clay make rackets and ball
Attach it to appropriate place with fevicol. I chose 2 corners of the frame:
photo frame
Attach it on the frame

Paint it with appropriate colors:
photo frame
Paint the rackets
Here it is ready with the photos of the champions!
photo frame
Ready with the photo
My son liked it very much. And his friend too. His friend told him that it was gift of his life time. What else I want!

Now holidays! So planning to design many sarees and complete pending projects in arts and crafts. Will share about those in coming posts,

Until then,

Love , laugh and live the life to the fullest,
-Ranjana

Wednesday, February 10, 2016

DIY craft- Tutorial to make Sandook(Box) from waste boxes

Sandook is a box , which is used earlier days for storing precious items like jewellery. These were used by king and queens of India for the storage of their jewels. Now also there is a big Sandook in my mother's place, in which many old books are stored. Inspired by the sandook, I made similar box, by a cardboard box.
DIY craft
Sandook made of cradboard

  Here are the steps how I made the sandook: 


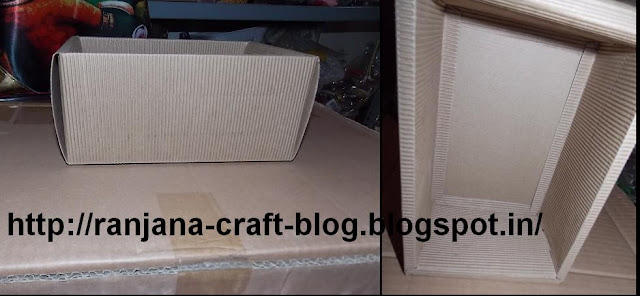
I had these two waste cardboard boxes . One was small and another quite flat one.Here are those boxes:
DIY craft
Two packaging boxes
To making of semi circle sides is quite difficult as it requires exact measurement. I measures the side of the box, and with half of its measurement drew two  semi circles on the card board:
DIY craft
Drawing the semi circles
 Then cut the semi circles along its boundaries:
DIY craft
The semicircles required for the sides
After cutting , the semi circles, bent the other card board piece of same size as the box. And attached the semi circles made out of cardboard on both the sides. The steps are illustrated in image number 4,5,6 and 7. Now the  portion of  of the sandook is made.
DIY craft
Steps to make the lid of the sandook
Next attached this top portion to the cardboard box, with fevicol and a cloth. The reson behind using the cloth was to make it easy to open the lid.
DIY craft
Attach the lid with a cloth on one side of the box
To this box attached  ice cream sticks all over the box, as illustrated int the below picture:
DIY craft
Attach ice cream sticks

It is now ready for painting and decoration! Painted with wood color and attached shiny tape along the corners.

Paint it and attach the border along the corners

Now the sandook is ready for storage:
DIY craft
Sandook is ready
It is now placed in my shelf  which was decoupaged , in my craft room.

I have stored all valuables like my spectacles, pen drive, and some electronics items in this sandook, so those will be easily accessible, as I keep forgetting the place where  kept those.

Will share about some more DIY crafts in coming posts.

Until then,
Love , laugh and live the life to the fullest,
-Ranjana

Google analytics